Disclaimer: In this post, I present a project that I finished successfully. However, it is not meant as a detailed construction manual. The description may be incomplete and might even contain errors. Feel free to use it as an inspiration for your own project but scrutinize the information presented here and use your common sense. Build at your own risk!
After I finished the assembly of the boombox, it was time for the initial setup and tests. These steps are specific to the amplifier used in the boombox, the Up2Stream AMP2.1.
Input Source ‘USB’
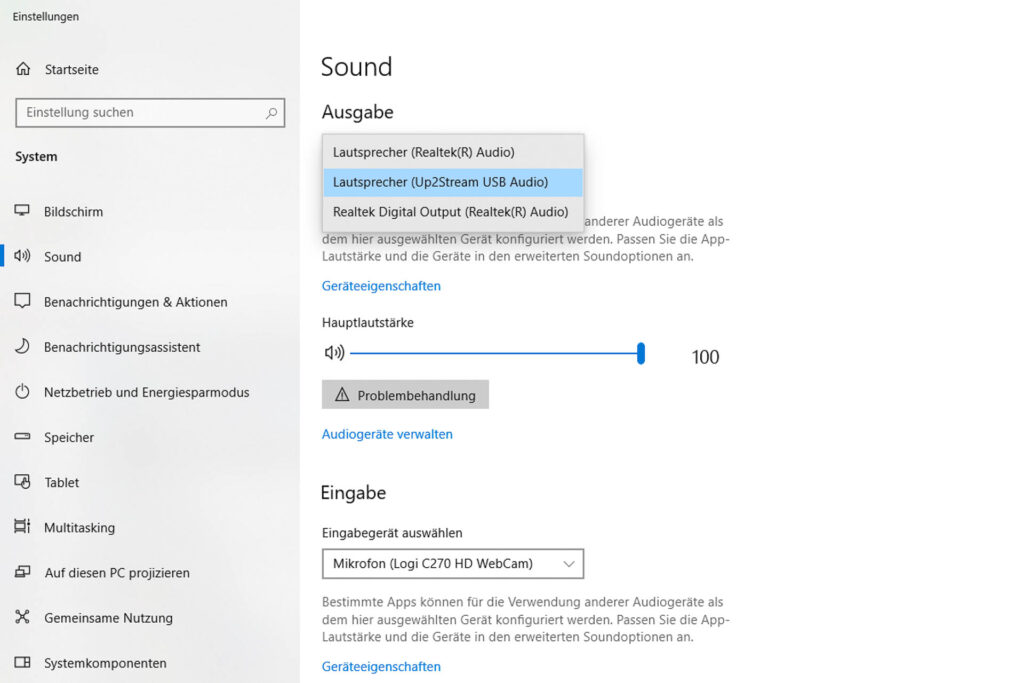
For input source ‘USB’, no initial setup was necessary. When the boombox is turned on and connected to a Windows PC via USB cable, it switches to input source ‘USB’ automatically. Activation of input source ‘USB’ is indicated by the red LED on the control panel. The PC detects the boombox immediately as sound output device ‘Speaker (Up2Stream USB Audio)’ and selects it automatically. From then on, audio from the PC is played through the boombox (up to 44.1khz/16bit).
Input Source ‘Line-In’
For input source ‘Line-In’, no initial setup was necessary. When the boombox is turned on and connected to an audio source via a cable with 3.5mm jack plug, it does not switch to input source ‘Line-In’ automatically. Instead, you have to press the volume knob to cycle through the available input sources until ‘Line-In’ is chosen. Activation of input source ‘Line-In’ is indicated by the green LED on the control panel. From then on, audio from the connected device is played through the boombox (expecting 1Vrms = 0dBV).
Input Source ‘Bluetooth’
According to the product specification, the Up2Stream amplifier used in the boombox supports Bluetooth 5.0 and codecs SBS and AAC. When paired with an Android 16 smartphone, it used the higher-quality AAC codec.
Before using input source ‘Bluetooth’, a Bluetooth device has to be paired with the boombox. When the boombox is turned on, you press the volume knob to cycle through the available input sources until ‘Bluetooth’ is chosen. When no Bluetooth device is paired, the blue LED on the control panel that indicates input source ‘Bluetooth’ will flash slowly. This indicates that the boombox is in pairing mode. On your Bluetooth device (for example, a smartphone) you should now see the boombox’s request for pairing. Initially, the displayed name is ‘SoundSystem_xxxx’. If you accept the request, the boombox is paired with the device and the blue LED switches from flashing to continuous light. From then on, audio from the connected device is played through the boombox.
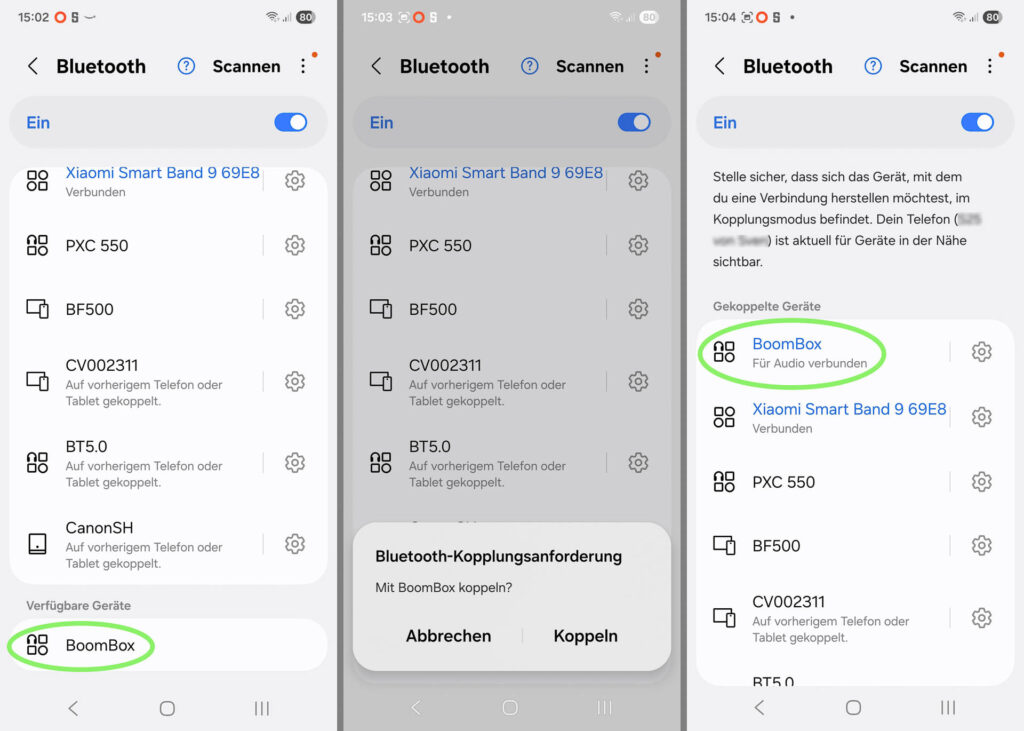
(In the screenshots shown above, the device name of the boombox is ‘BoomBox’ instead of ‘SoundSystem_xxxx’. This is because I renamed the Up2Stream amplifier in an earlier, optional step not described here.)
When the boombox is already paired with a Bluetooth device and you switch to input source ‘Bluetooth’, the blue LED will flash rapidly. This indicates that the boombox searches for the paired device. If the device is active and within the Bluetooth range, the blue LED will switch from flashing to continuous light and the device can be used. If you want to pair the boombox with a different Bluetooth device, you have to short press the Power button on the control panel twice to switch the boombox back to pairing mode.
Input Source ‘WiFi’
According to the product specification, the Up2Stream amplifier used in the boombox supports WLAN 802.11 b/g/n (up to 150 MBit/s, 2.4GHz only).
First, install the 4Stream app on your smartphone. Then, turn on the boombox and press the volume knob to cycle through the available input sources until ‘WiFi’ is chosen. When the boombox is not connected to a WiFi network, the white LED on the control panel that indicates input source ‘WiFi’ will flash slowly. This indicates that the boombox is in connecting mode and has created a temporary WiFi hotspot with the name ‘SoundSystem_xxxx’. Start the 4Stream app on your smartphone. It will detect a device with the name ‘SoundSystem_xxxx’ and ask if it should setup this device. Then, it will ask for the SSID of the regular WLAN to connect to and its password. If the setup was successful, the boombox will connect to the WLAN and the white LED switches from flashing to continuous light. Also, the temporary WiFi hotspot will be switched off. From then on, the 4Stream app will use the selected WLAN to send audio to the boombox.
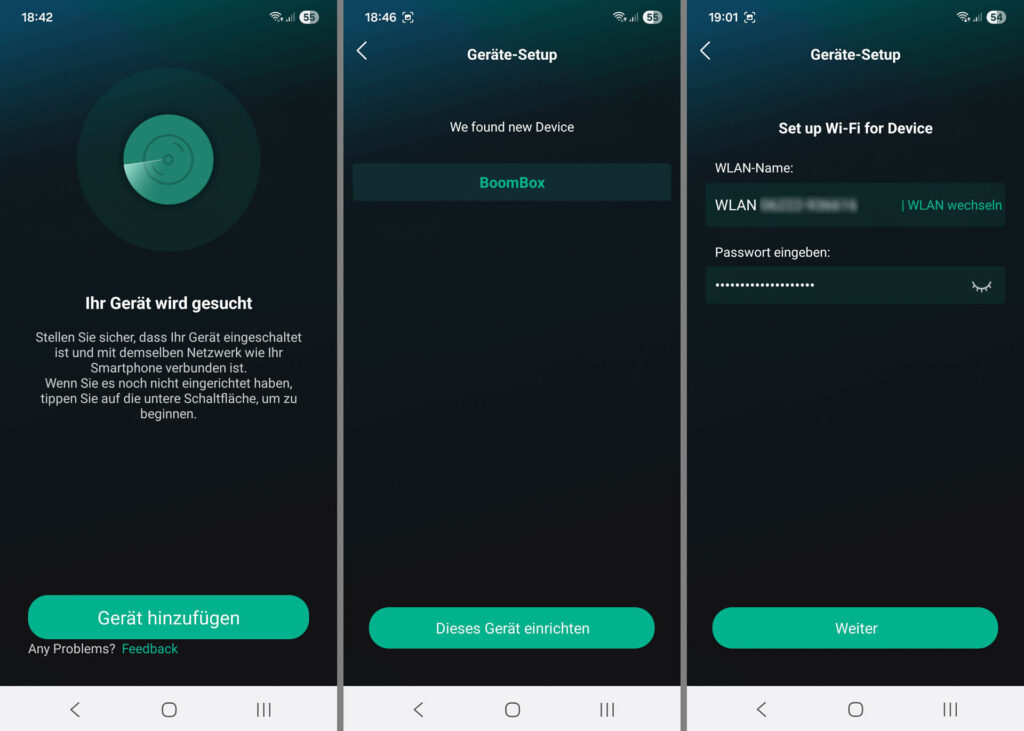
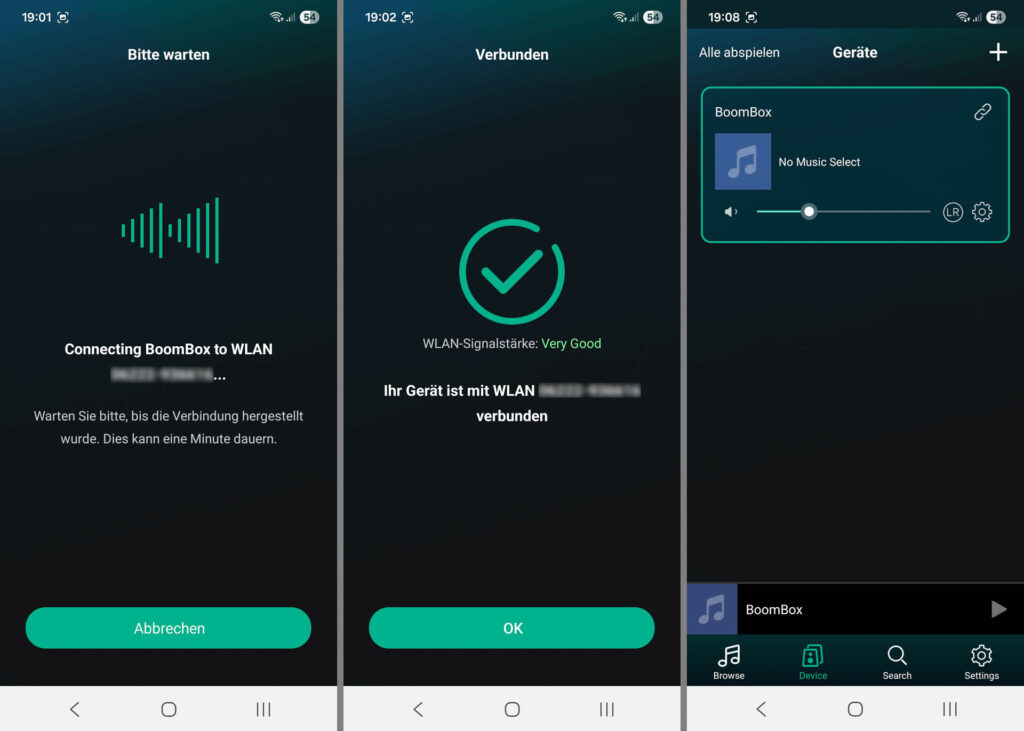
(In the screenshots shown above, the device name of the boombox is ‘BoomBox’ instead of ‘SoundSystem_xxxx’. This is because I renamed the Up2Stream amplifier in an earlier, optional step not described here.)
Via the 4Stream app, you can send audio from several sources to the boombox:
- audio stored on the smartphone
- audio provided via DNLA, UPnP, or similar protocols (for example, stored on your NAS)
- audio from streaming providers, like Spotify or Amazon Music
- audio from internet radio stations
You can also use the 4Stream app to switch the boombox to a specific input source, set volume, treble and bass, or integrate the boombox into a multiroom music system.
ACPWorkbench Tuning Tool
The manufacturer of the amplifier, Up2Stream (formerly: Arylic), has put a DSP (Digital Signal Processor) on the board. They do not state which specific DSP they use. On my copy of the board, it is a MVSilicon BP1064A2 (MV stands for Mountain View). This is a 32-bit RISC chip for Bluetooth-based audio applications: 288MHz, 320KByte RAM, 2MByte Flash ROM, 16-bit ADC / 24-bit DAC (both up to 48KHz), parametric equalizer. Up2Stream sells a software tool to configure/finetune the DSP, called ACPWorkbench. You have to buy a license and can then use the tool on one computer (Windows only). To use it, connect the boombox to the PC via USB cable and start ACPWorkbench there. At startup, the tool will read the current configuration of the amplifier’s DSP and display it. You can make changes and finally write the configuration back to the DSP.
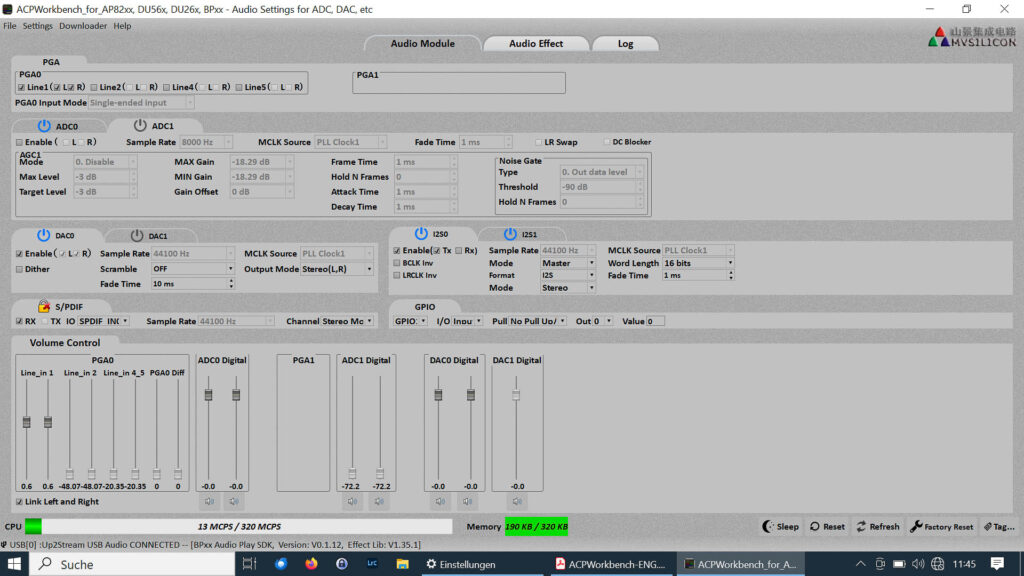
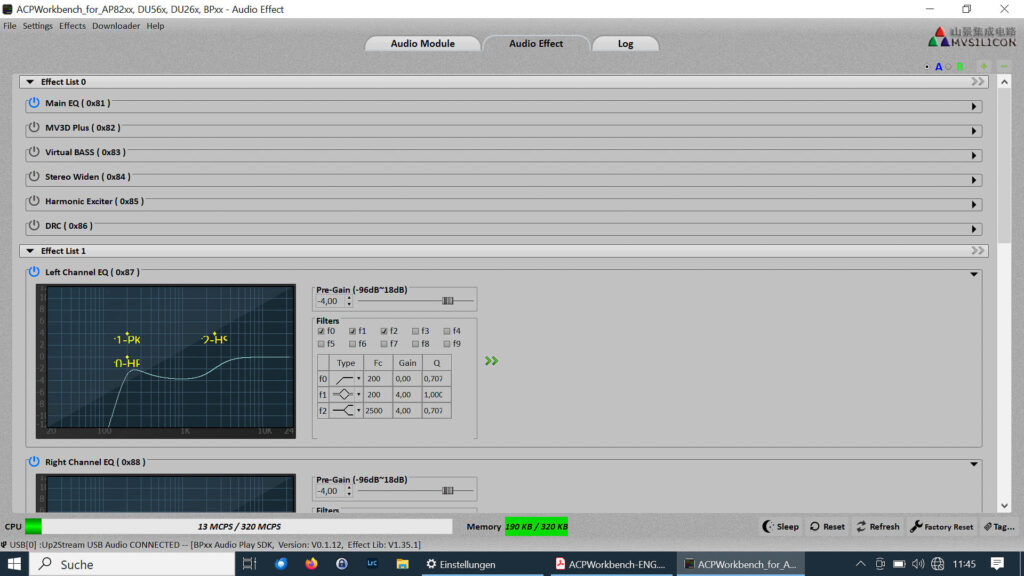
This is an audio expert tool and a detailed presentation would go too far here. The UI is quite cluttered and overwhelming and it seems there are no updates to the tool already for years.
This is (probably) the last post of the Boombox series. If you have questions, don’t hesitate to contact me.