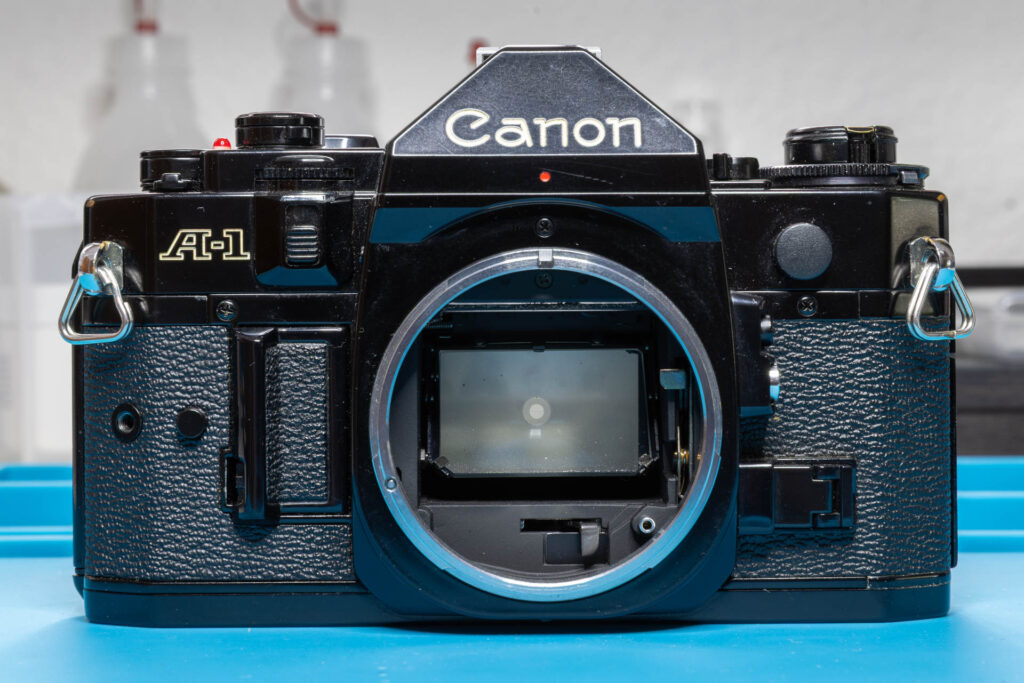
Disclaimer: The test procedure I present in this post is inspired by the official service manual and renowned repair articles but mainly reflects my own experience. The description may be incomplete and might even contain errors. Consider that I am just a self-taught hobbyist, not a trained professional. Copy this procedure at your own risk! Also, consider that any attempt to disassemble and repair a camera carries a certain risk to worsen its condition or to even breaking it completely.
Sometimes, you want to perform a quick test on whether there are obvious problems with the shutter of a Canon A-1. Unfortunately, you don’t have a suitable battery at hand (typically, a 4LR44 6V alkaline battery is used). Without a battery, you cannot release the shutter electronically. In this post, I present some quick tests that you can still perform in this situation. They can reveal if there are certain fundamental problems with the mechanical function of the shutter. They will not reveal if the shutter speeds are correct or whether there is “shutter capping” (a dark/black banding on one side of the photo).
Preparation
If a lens is mounted to the camera, remove it.
If there is still a film in the camera, rewind and remove it.
Finally, follow the procedure described in this blog post to remove the bottom cover of the camera.
The exposure mode, shutter speed, and aperture set on the camera do not have an influence on the following tests. Just keep them as they are.
Tools
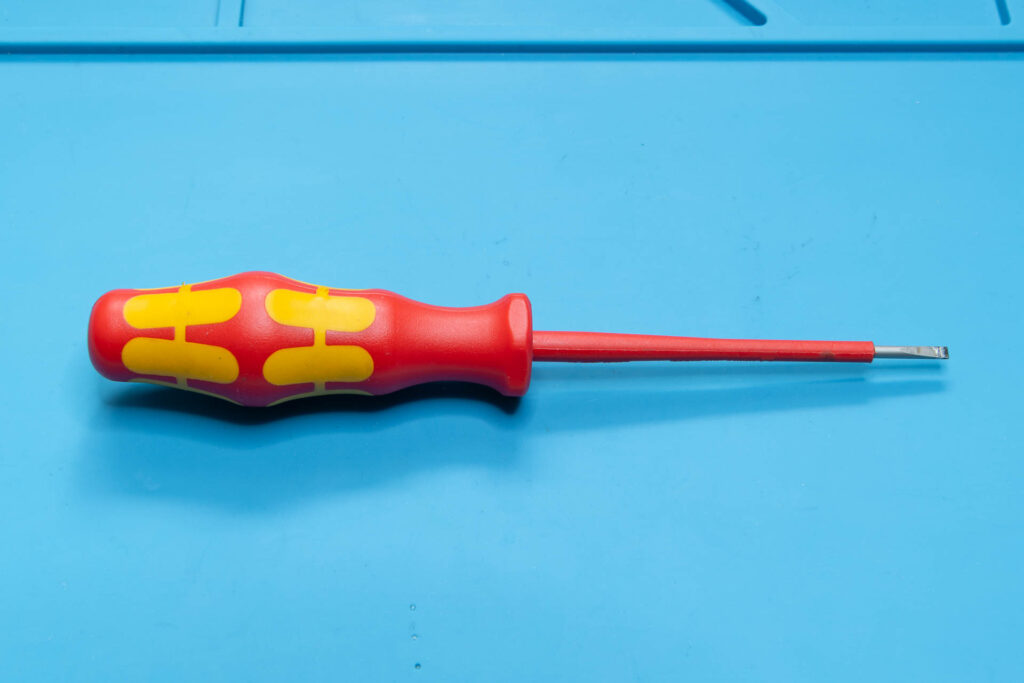
For the following tests, you need a small flat-head screwdriver (blade thickness ≤ 0.7mm) or tweezers with sharp points. Usually, I use a screwdriver:
However, the most important tools for the tests are your eyes!
Step 1: If Not Already Done, Cock the Shutter
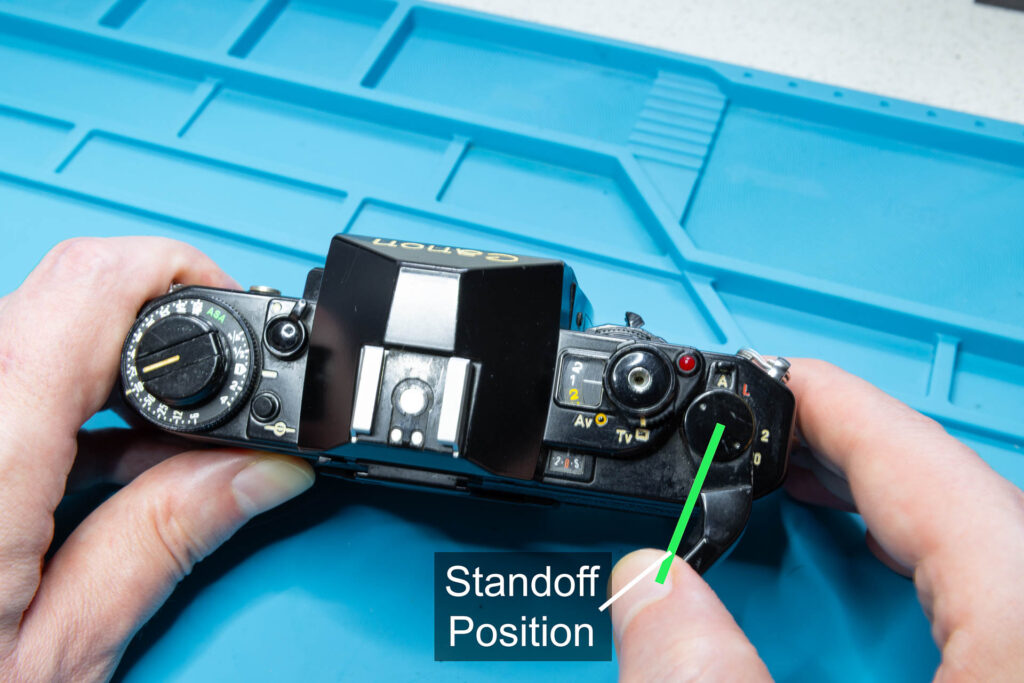
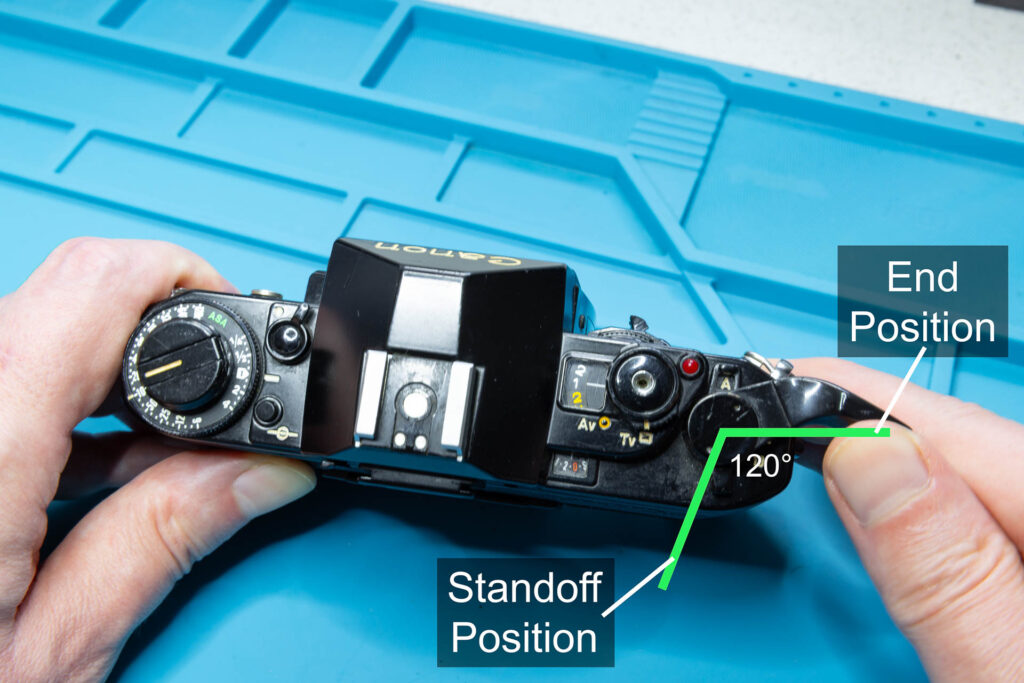
The starting point of the following tests is the cocked shutter. If the shutter is not already cocked, use the film advance lever to do it now. Only use light force. Start at the standoff (“resting”) position of the film advance lever (see picture below) and move the lever about 120° in counter-clockwise direction. Afterwards, the lever should return to the standoff position automatically. If you cannot move the film advance lever beyond its standoff position, the shutter is probably already cocked.
Step 2: Check the Shutter Mechanism on the Bottom of the Camera
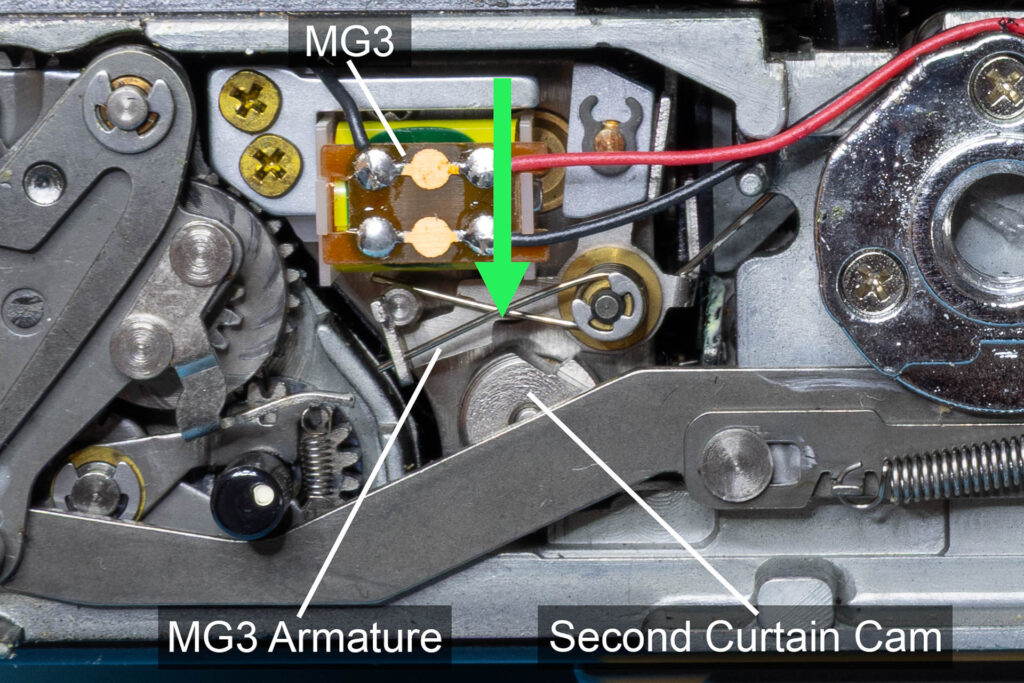
When the shutter is cocked, the shutter mechanism on the bottom of the camera has to look like this:
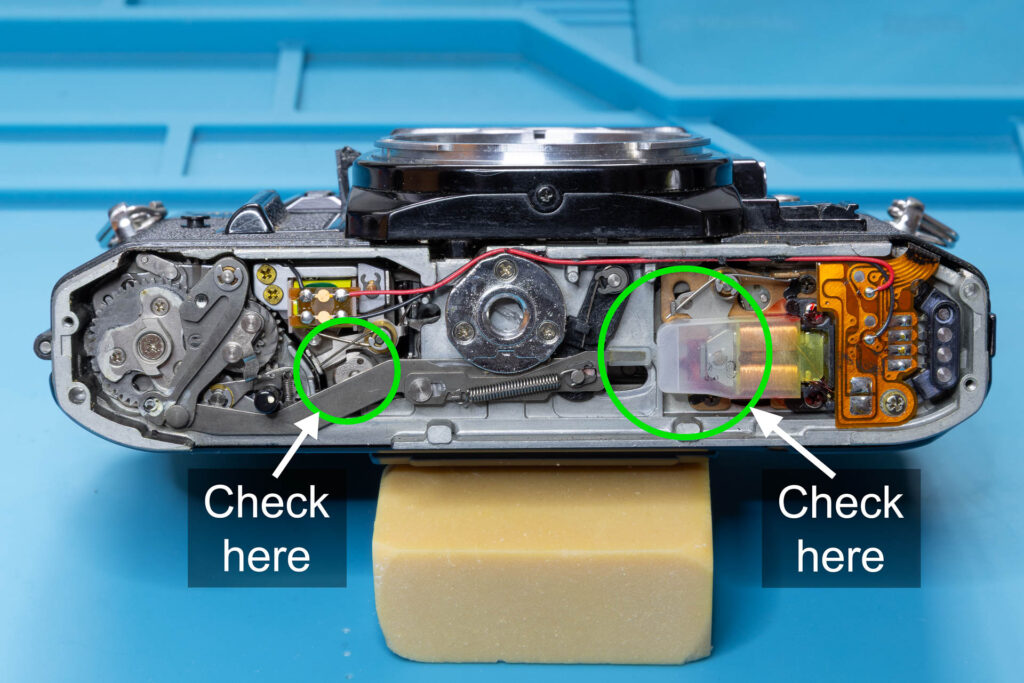
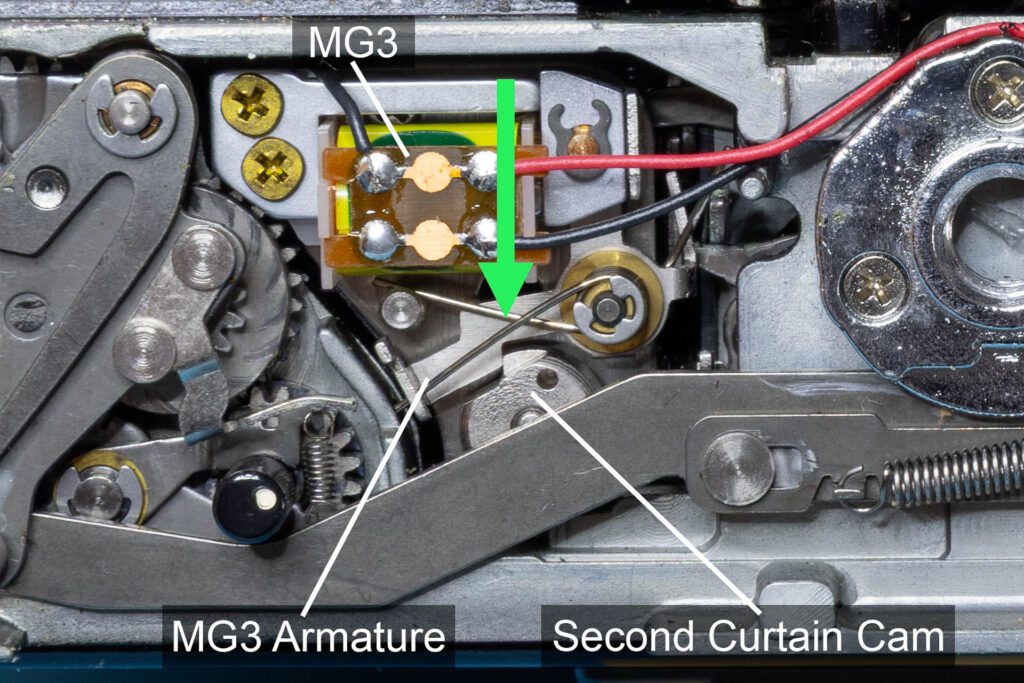
On the left side, you see electromagnet MG3 that is responsible for releasing the second curtain of the shutter. When the shutter is cocked, the armature of the magnet has to be in its “engaged” position (upper arm touching the magnet). The lower arm of the armature touches the latch of the second curtain cam, preventing it from rotating. If there is a larger gap between the armature and the latch or the latch is in a totally different position, the camera is in need of repair.
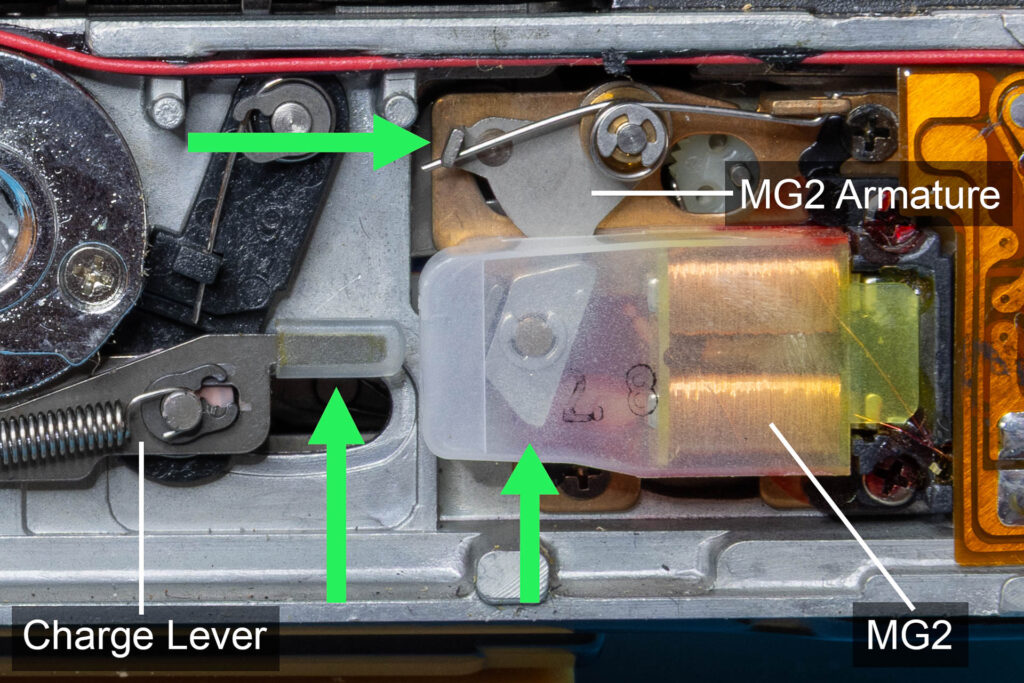
On the right side, you see combination magnet* MG2 that is responsible for disengaging the mirror (that in turn releases the first curtain). When the shutter is cocked, the armature of the magnet has to be in its “engaged” position (lower arm touching the magnet). The upper arm of the armature is in its lowest position, only a millimeter above the plastic housing of the magnet. The charge lever is in its resting position with its right end not reaching inside the plastic housing of the magnet. If the MG2 armature or the charge lever are not in the described positions, the camera is in need of repair.
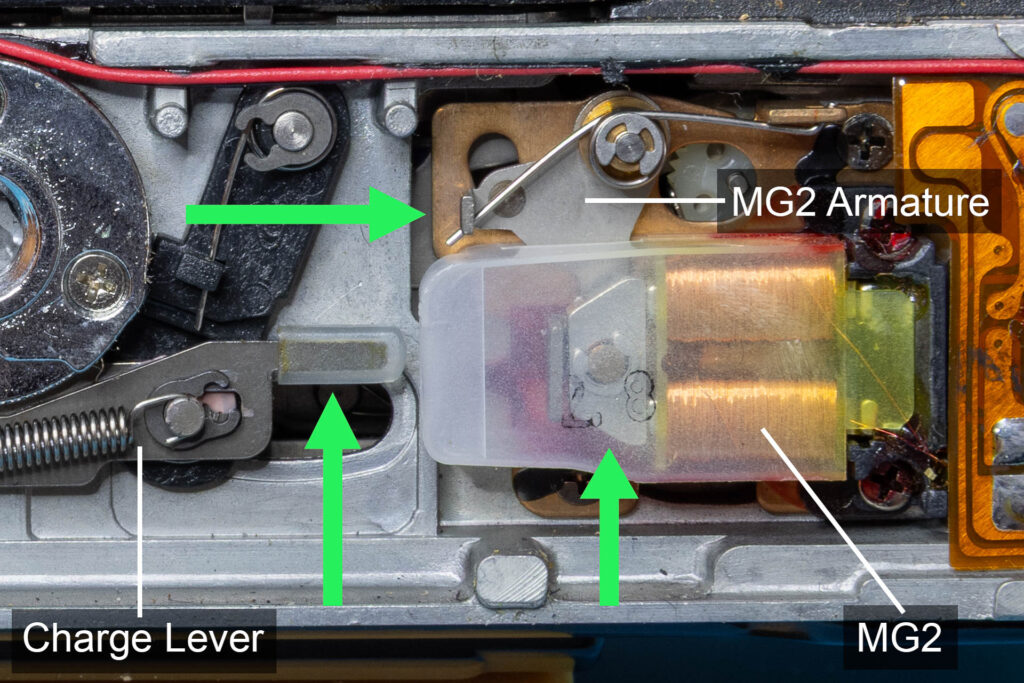
*A combination magnet is a special electromagnet that has a permanent magnet as core. In a way, it acts like an “inverse” electromagnet: When no current flows through the coil of the electromagnet, its armature is engaged (due to the force of the permanent magnet). When current flows through the coil, its armature is released (since the magnet field of the electromagnet cancels out the magnet field of the permanent magnet). Due to this construction, the armature can stay engaged over a long period of time without the need of any current flow.
Step 3: Release the Shutter
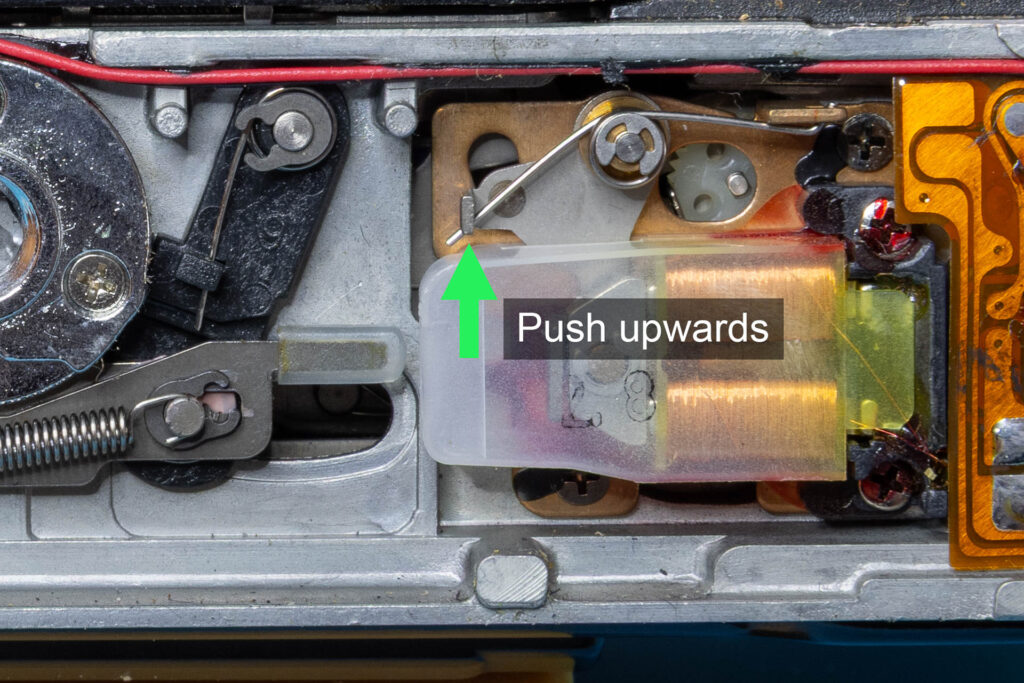
Since we have no battery available, we cannot release the shutter via the camera’s release button. However, we can release it by disengaging the MG2 armature. As described above, the upper arm of the armature is in its lowest position, only a millimeter above the plastic housing of the magnet. To disengage it, you can use a small flat-head screwdriver. Carefully slide the blade of the screwdriver between the upper arm of the armature and the plastic housing and push the arm upwards. Only little force is needed, the armature will disengage after only a millimeter of movement. When the shutter is released, you should hear a noise, coming from both the mirror flipping up and down and the travel of the shutter curtains. If you hear no noise, the camera is in need of repair.
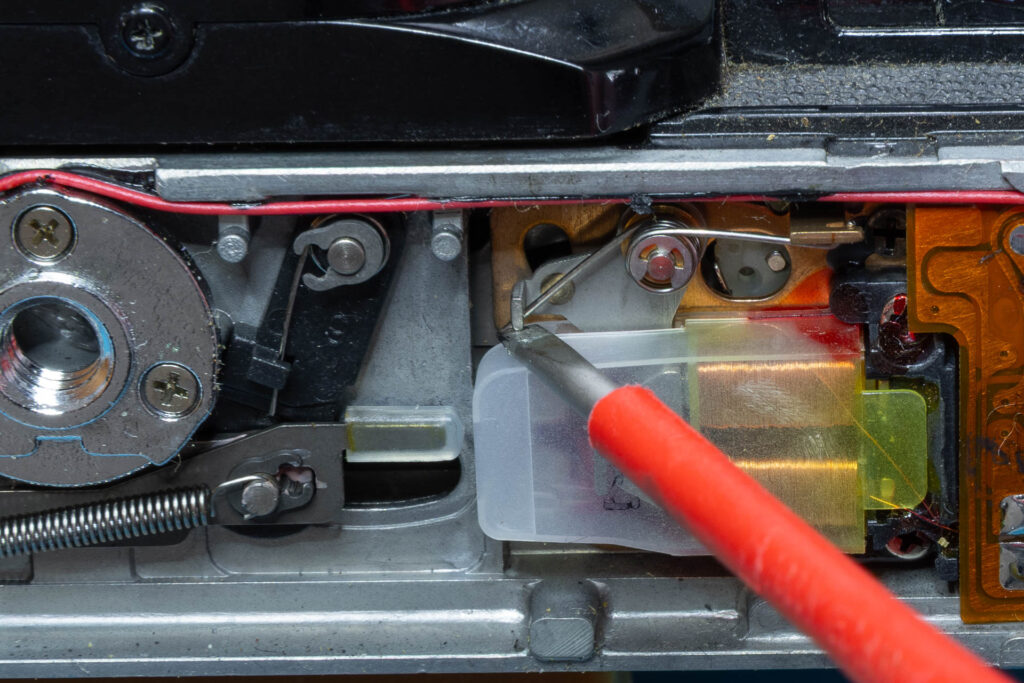
This method to release the shutter mechanically will not work if you have already removed the mirror box. In this case, you can release the shutter only via the first curtain latch lever of the shutter assembly: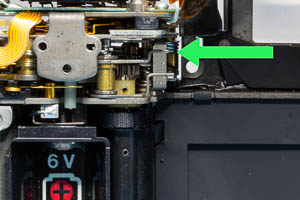
Step 4: Check the Shutter Mechanism on the Bottom of the Camera (Again)
When the shutter is not cocked, the shutter mechanism on the bottom of the camera has to look like this:
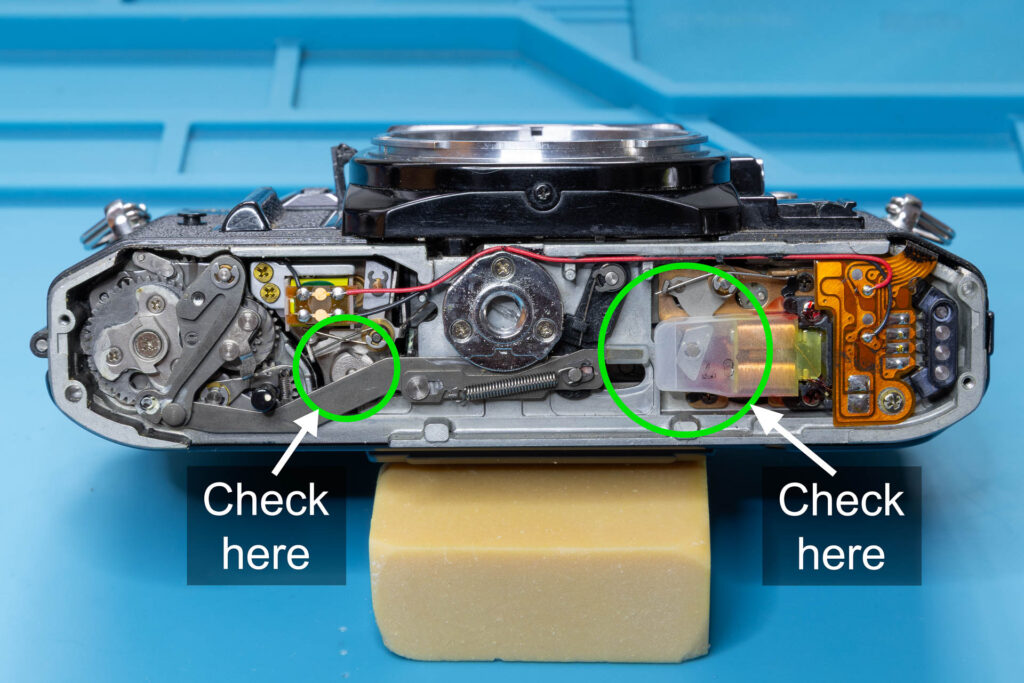
On the left side, you see electromagnet MG3. When the shutter is not cocked, the armature of the magnet has to be in its “released” position (upper arm not touching the magnet). The lower arm of the armature does not touch the latch of the second curtain cam. If this is not the case, the camera is in need of repair.
On the right side, you see combination magnet MG2. When the shutter is not cocked, the armature of the magnet has to be in its “released” position (lower arm not touching the magnet). The upper arm of the armature is in its highest position, about four millimeters above the plastic housing of the magnet. The charge lever is in its resting position with its right end not reaching inside the plastic housing of the magnet. If the MG2 armature or the charge lever are not in the described positions, the camera is in need of repair.
Step 5: Check the Shutter Curtains
The Canon A-1 has a horizontal focal-plane shutter with two shutter curtains made of cloth. Open the back cover by pulling up the rewind knob to inspect the curtains.
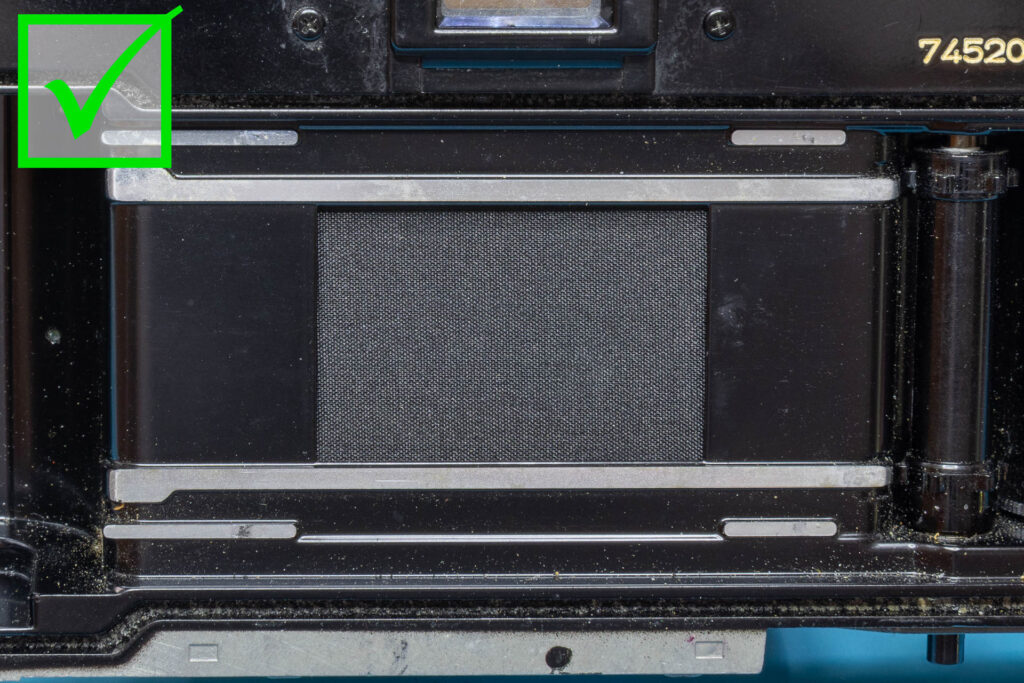
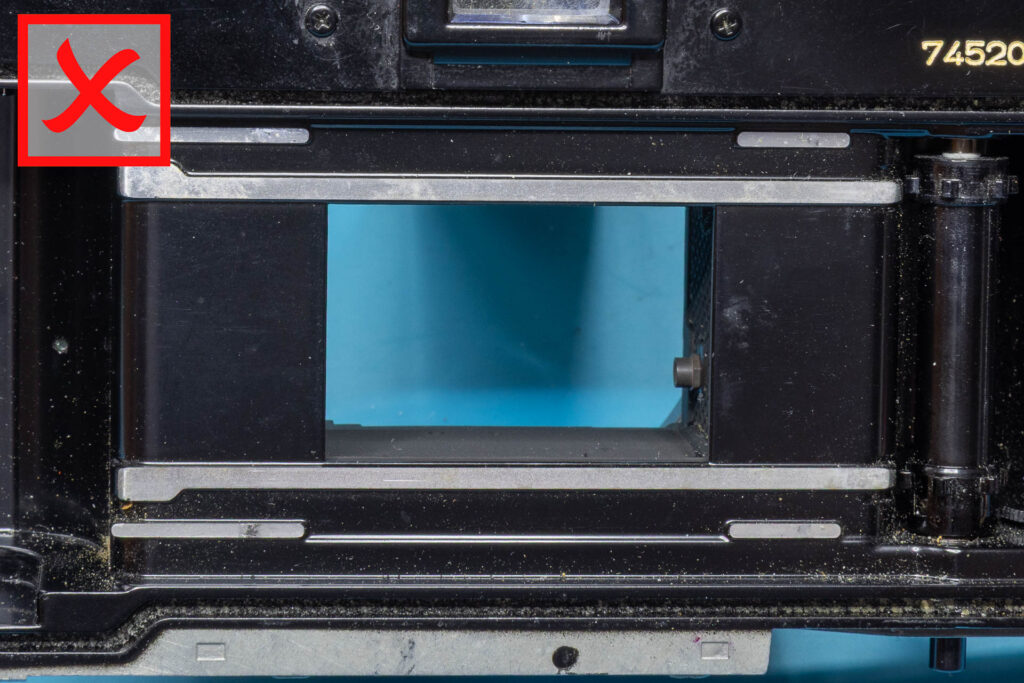
Regardless of whether the shutter is cocked or not, you should only see one of the curtains when you look into the film chamber. Either the first curtain (also called “opening curtain”) when the shutter is cocked or the second curtain (also called “closing curtain”) when the shutter is not cocked. In the following cases, the camera is in need of repair:
- you do not see a curtain at all (you can look through the frame)
- the curtain has holes or tears
- the curtain only covers part of the frame, the rest is open
- the metal bar at the end of the curtain is visible
- you see parts of both curtains
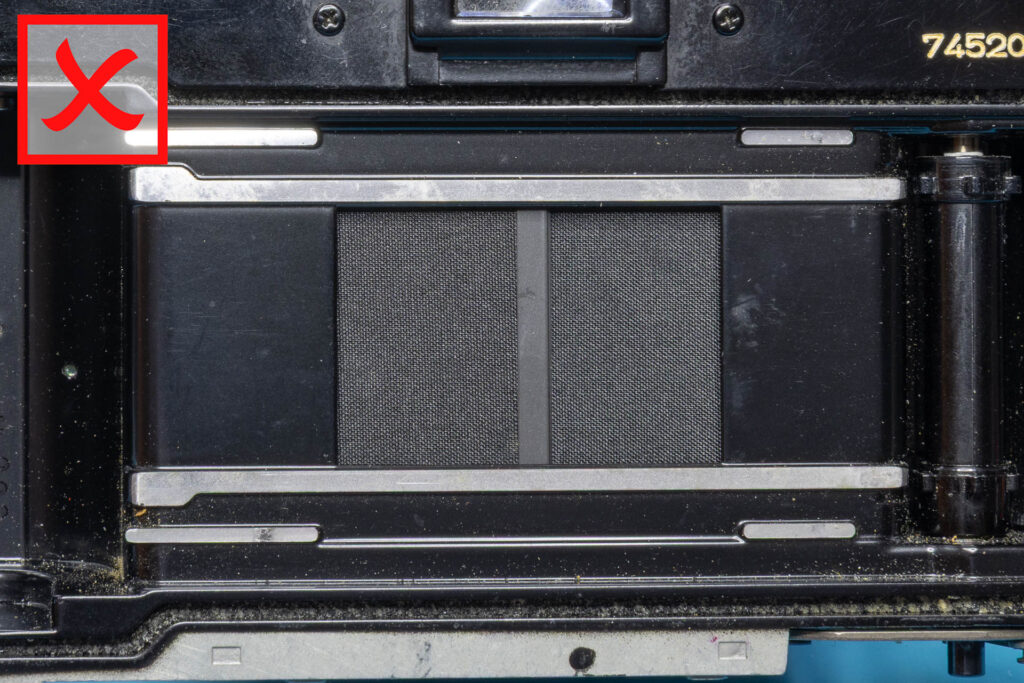
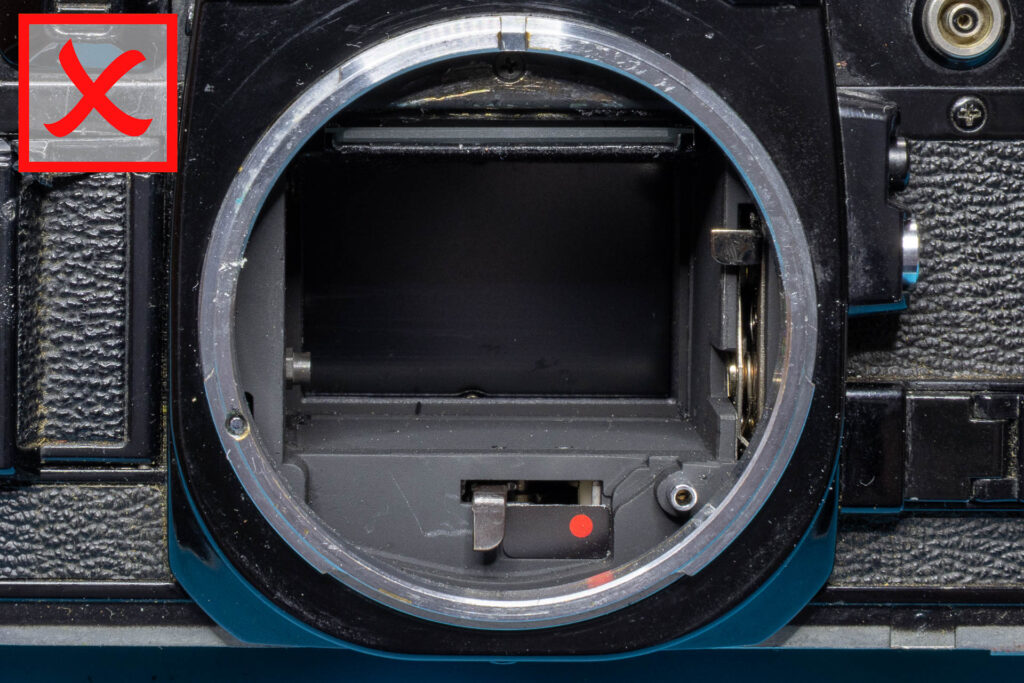
If the shutter is not cocked and you cock it slowly using the film advance lever, you should see that both curtains move from the left to the right of the frame, with an overlap of their metal end bars of about one millimeter. If this is not the case or there is even an open gap between the two metal bars, the camera is in need of repair.
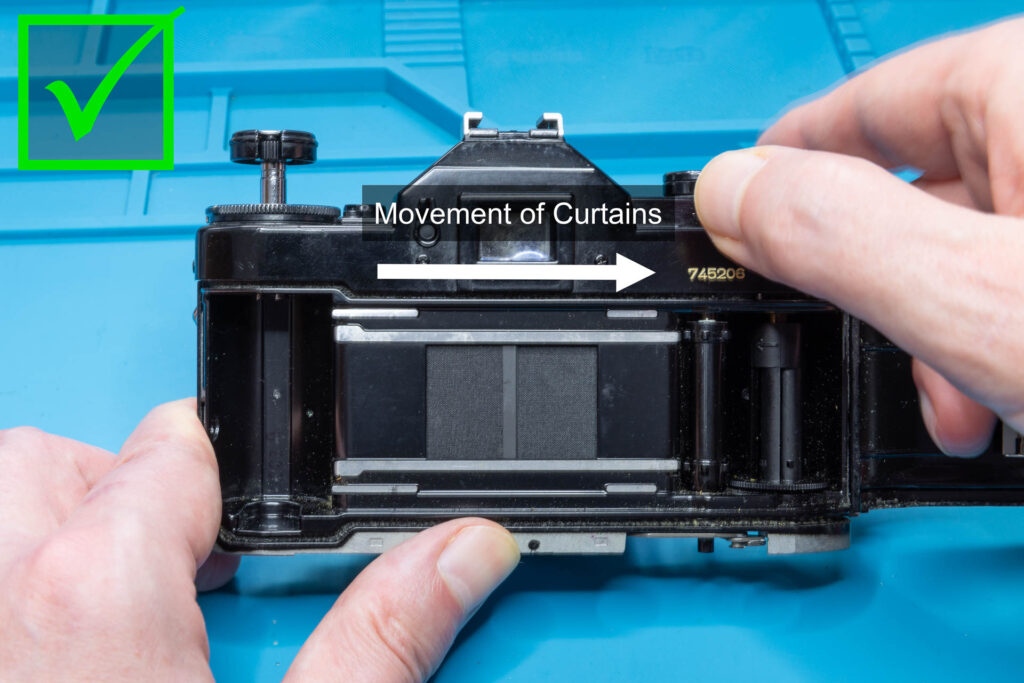
If you release the shutter afterwards (as described in Step 3) while observing the frame you should see no gaps between the curtains when they move back from the right to the left. Otherwise, the camera is in need of repair. Granted, this is very hard to spot since the total travel time of the curtains is only about 10 milliseconds. The reason that there should not be a gap between the curtains is that they should be released at the same time and should move with the same speed. This only holds for tests without a battery. With battery, there will be a gap those size depends on the shutter speed chosen.
Even if all the tests described above were successful, it does not necessarily mean that the camera is fully functional. We have only tested certain aspects of the mechanical functionality of the shutter and ruled out some of the more common problems. For more in-depth tests, you will need a battery and probably some test equipment (like a shutter speed tester).
That’s all.