Disclaimer: In this post, I present a project that I finished successfully. However, it is not meant as a detailed construction manual. The description may be incomplete and might even contain errors. Feel free to use it as an inspiration for your own project but scrutinize the information presented here and use your common sense. Build at your own risk!
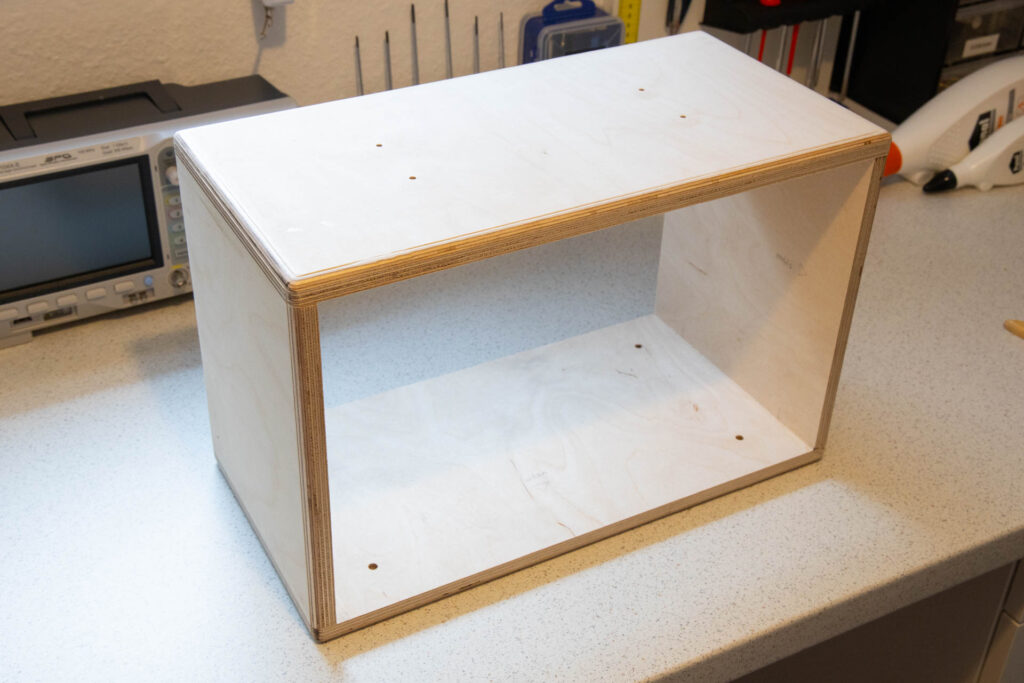
The cabinet of the boombox has a rectangular shape and is made of birch plywood. Top, bottom, and both side pieces have a thickness of 15mm. Front and back piece have a thickness of 12mm. The basic structure of the cabinet looks like this:
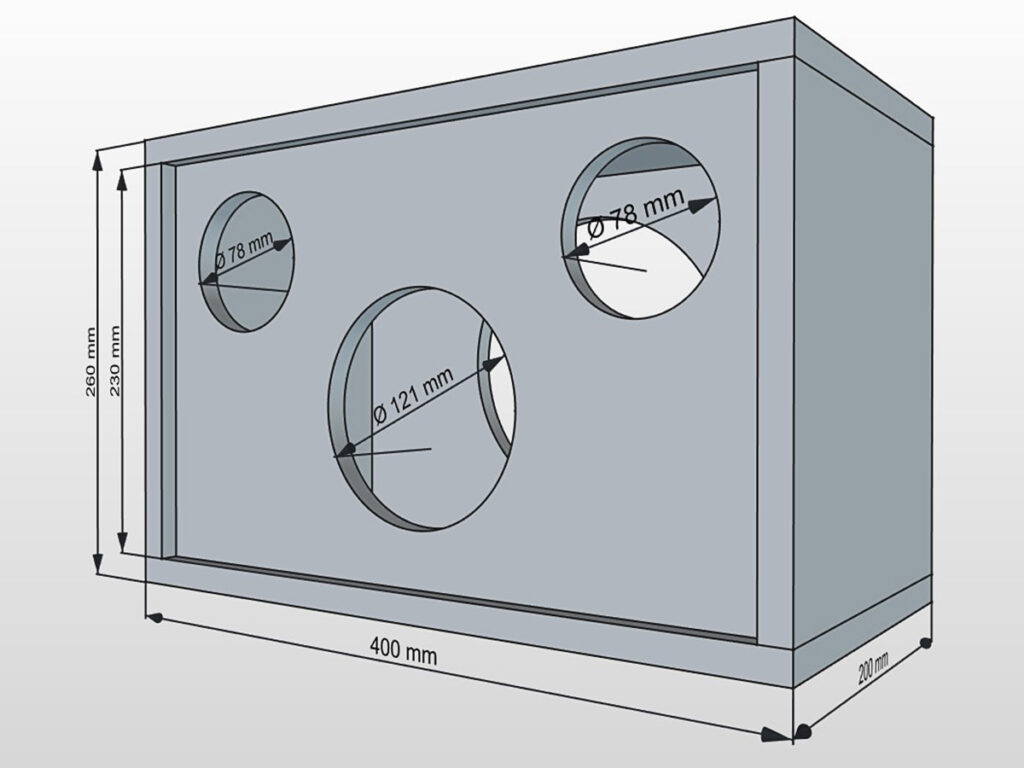
The dimensions are:
- Top/bottom piece: 400x200x15mm
- Left/right side piece: 230x200x15mm
- Front/back piece: 370x230x12mm
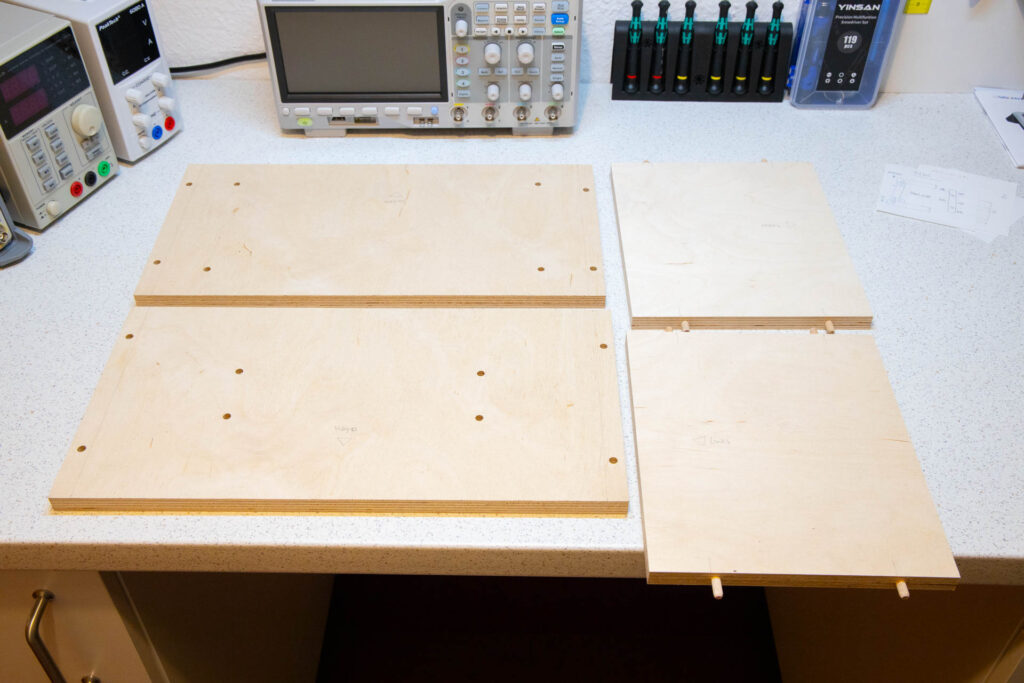
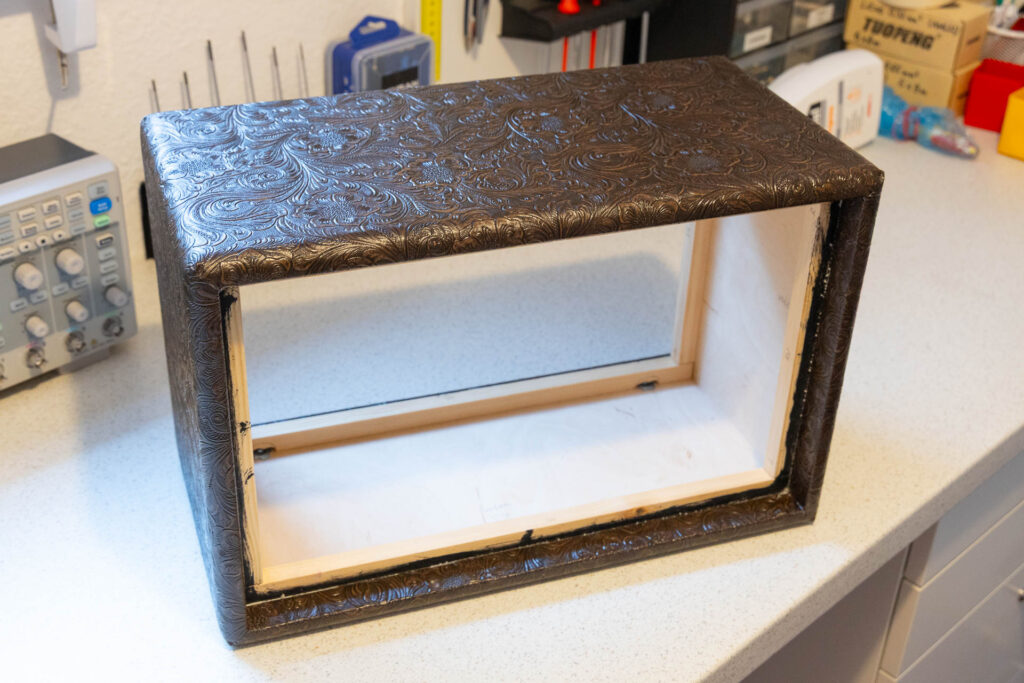
First, I drilled holes for the carrying handle into the top piece and holes for the four rubber feet into the bottom piece. Then, I drilled holes for 6mm wooden dowels into the top/bottom edges of the side pieces and corresponding holes into the inner surface of the top/bottom pieces. I decided to use dowels to increase the stability of the cabinet since it will become quite heavy. Finally, I glued the top, bottom, and side pieces together and made sure that the cabinet was square.
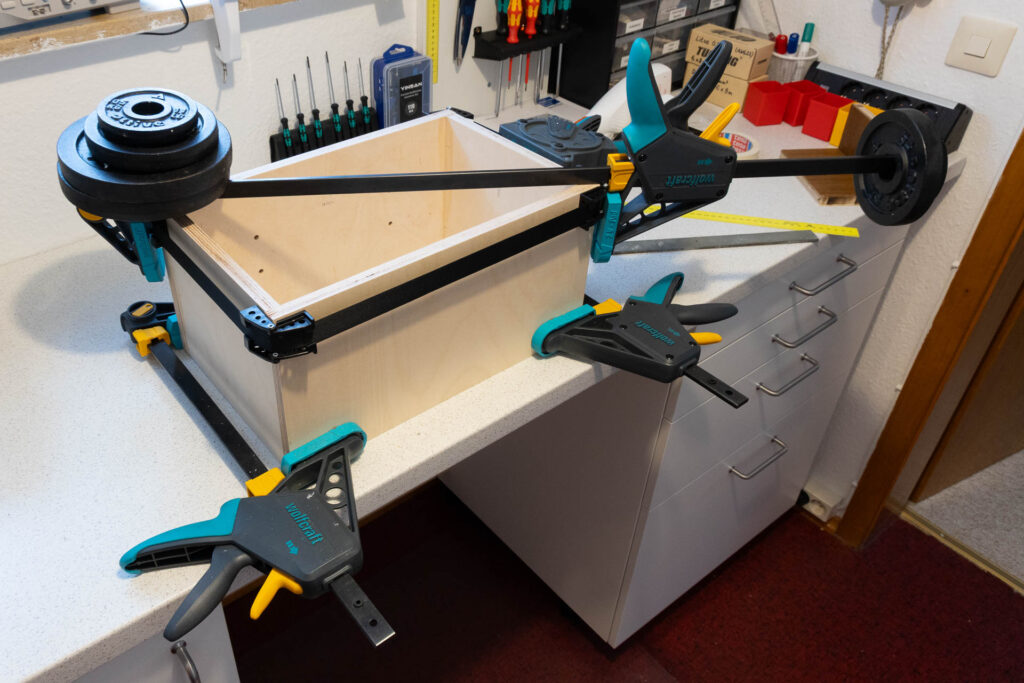
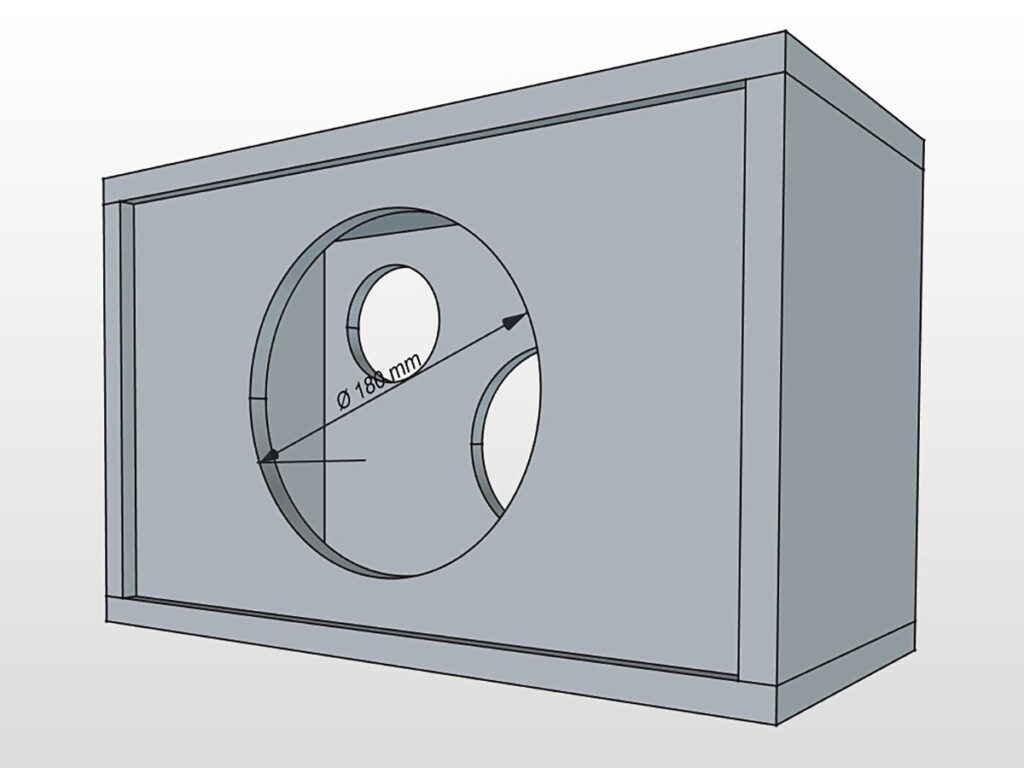
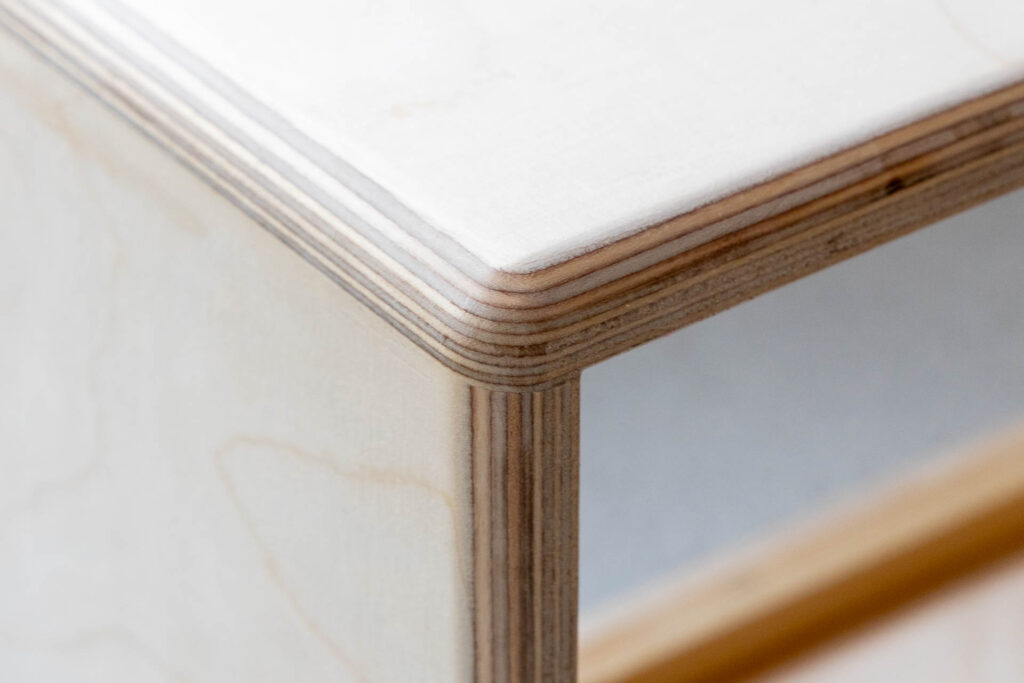
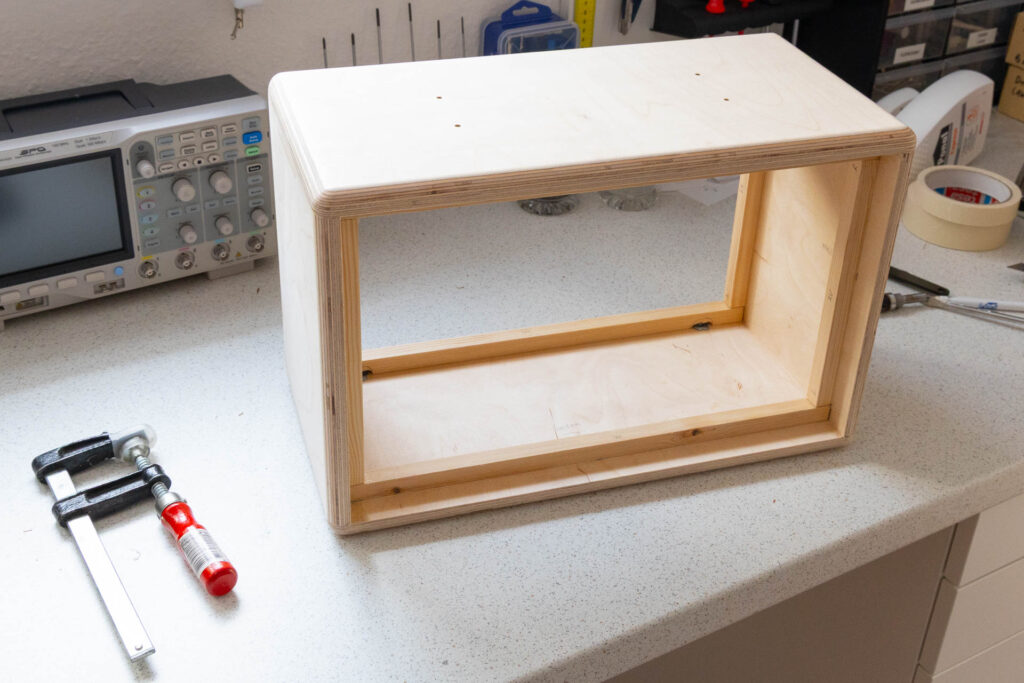
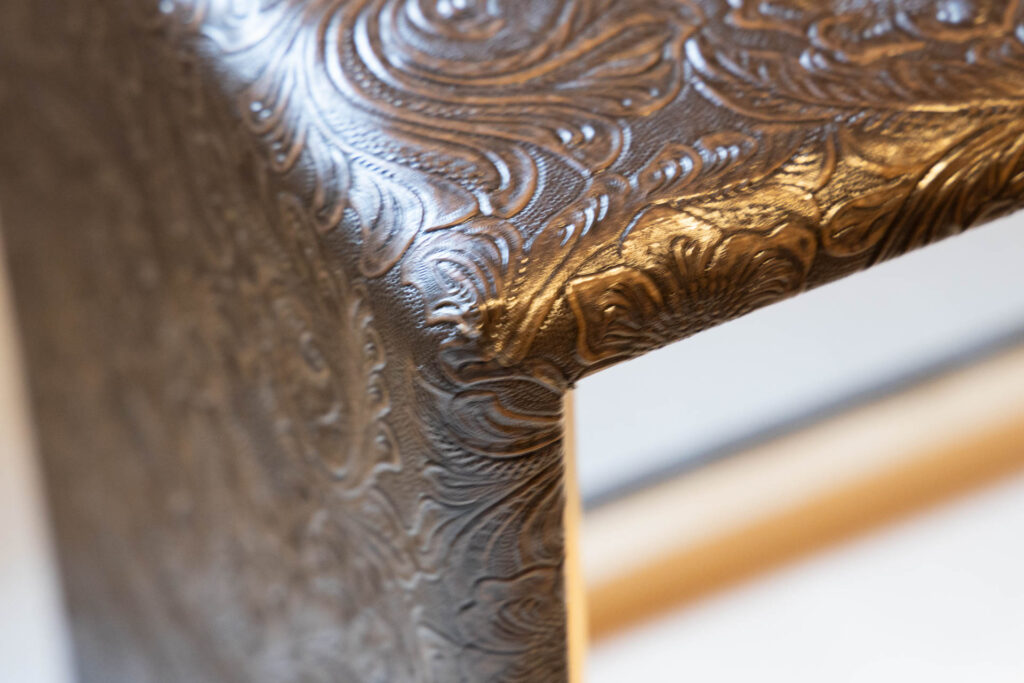
Since I wanted to use steel case corners with an inside radius of 12mm to protect the cabinet from wear and tear, I rounded off all outer edges with a router. For this, I used a 12,7mm (1/2″) rounding cutter, the nearest to 12mm I could find. Then, I added 15x15mm wooden strips to the inside of the cabinet to further increase its stability and provide a mounting surface for the front and back piece. The strips are glued in at a distance of 22mm from the edges of the cabinet so that the front and back will later be recessed by 10mm.
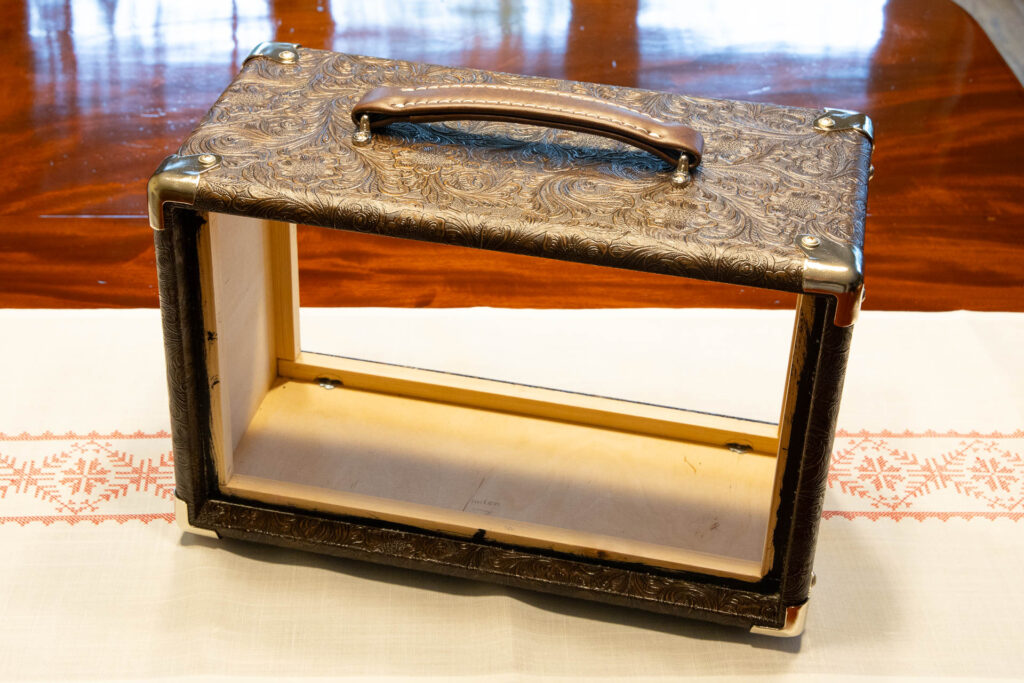
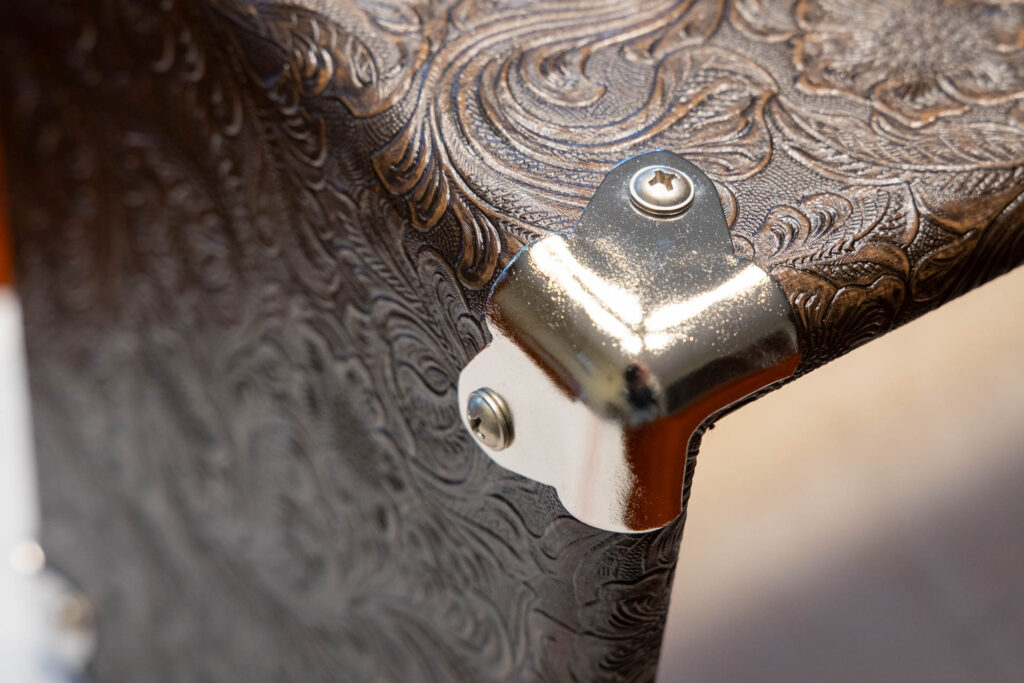
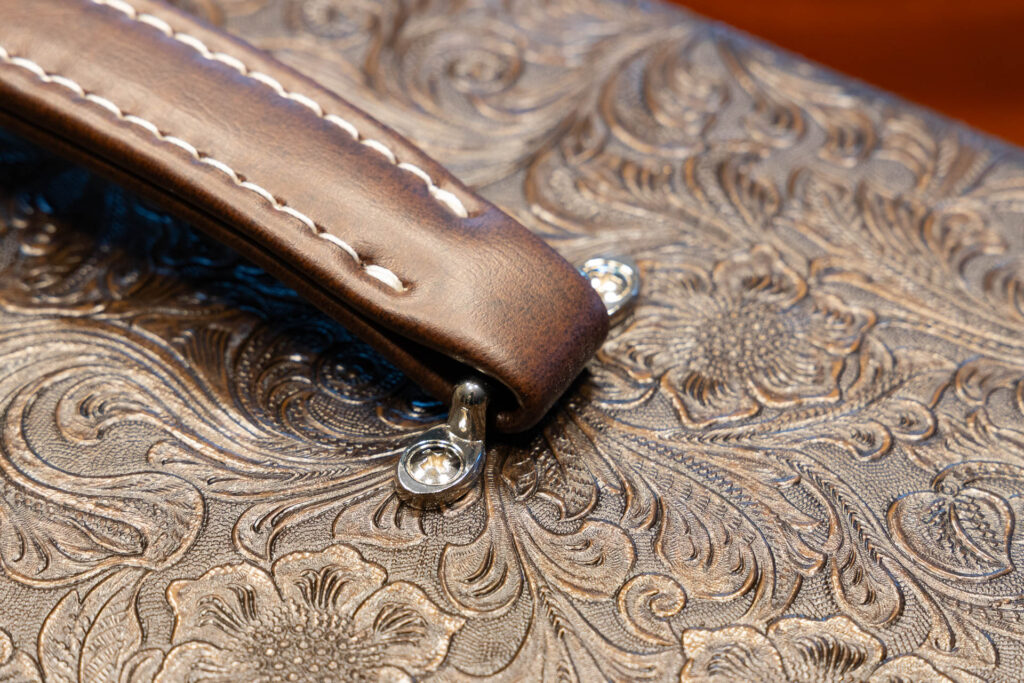
Then, I used a single piece of Tolex (a special type of leatherette) to cover the cabinet. I used dark-brown Tolex (“western style”) of about 140x30cm and glued it on, starting in the middle of the bottom and wrapping it completely around the cabinet. The Tolex was also glued around the edges of the cabinet up to the wooden strips inside. Be warned: Achieving clean-looking corners is a bit tricky since it requires cutting the Tolex and removing small parts of it. There are videos on how to do it and I suggest to watch at least one beforehand. My advice: Think twice, cut once! Finally, I added the steel corners, the leather handle and the four rubber feet.
In the next post, I will describe how I made the front and back piece of the cabinet.